Here's some more Baby J gifts I made. I used Denyse Schmidt's line called Florence to make a quilted changing pad, some burp cloths and a necktie onesie.
 And here's cute little baby J wearing his necktie onesie.........
If you visit my blog regularly, this will be a repeat; but I wanted to enter my Oink A Doodle Moo quilt in Amy's Quilt Festival and that required a new post.
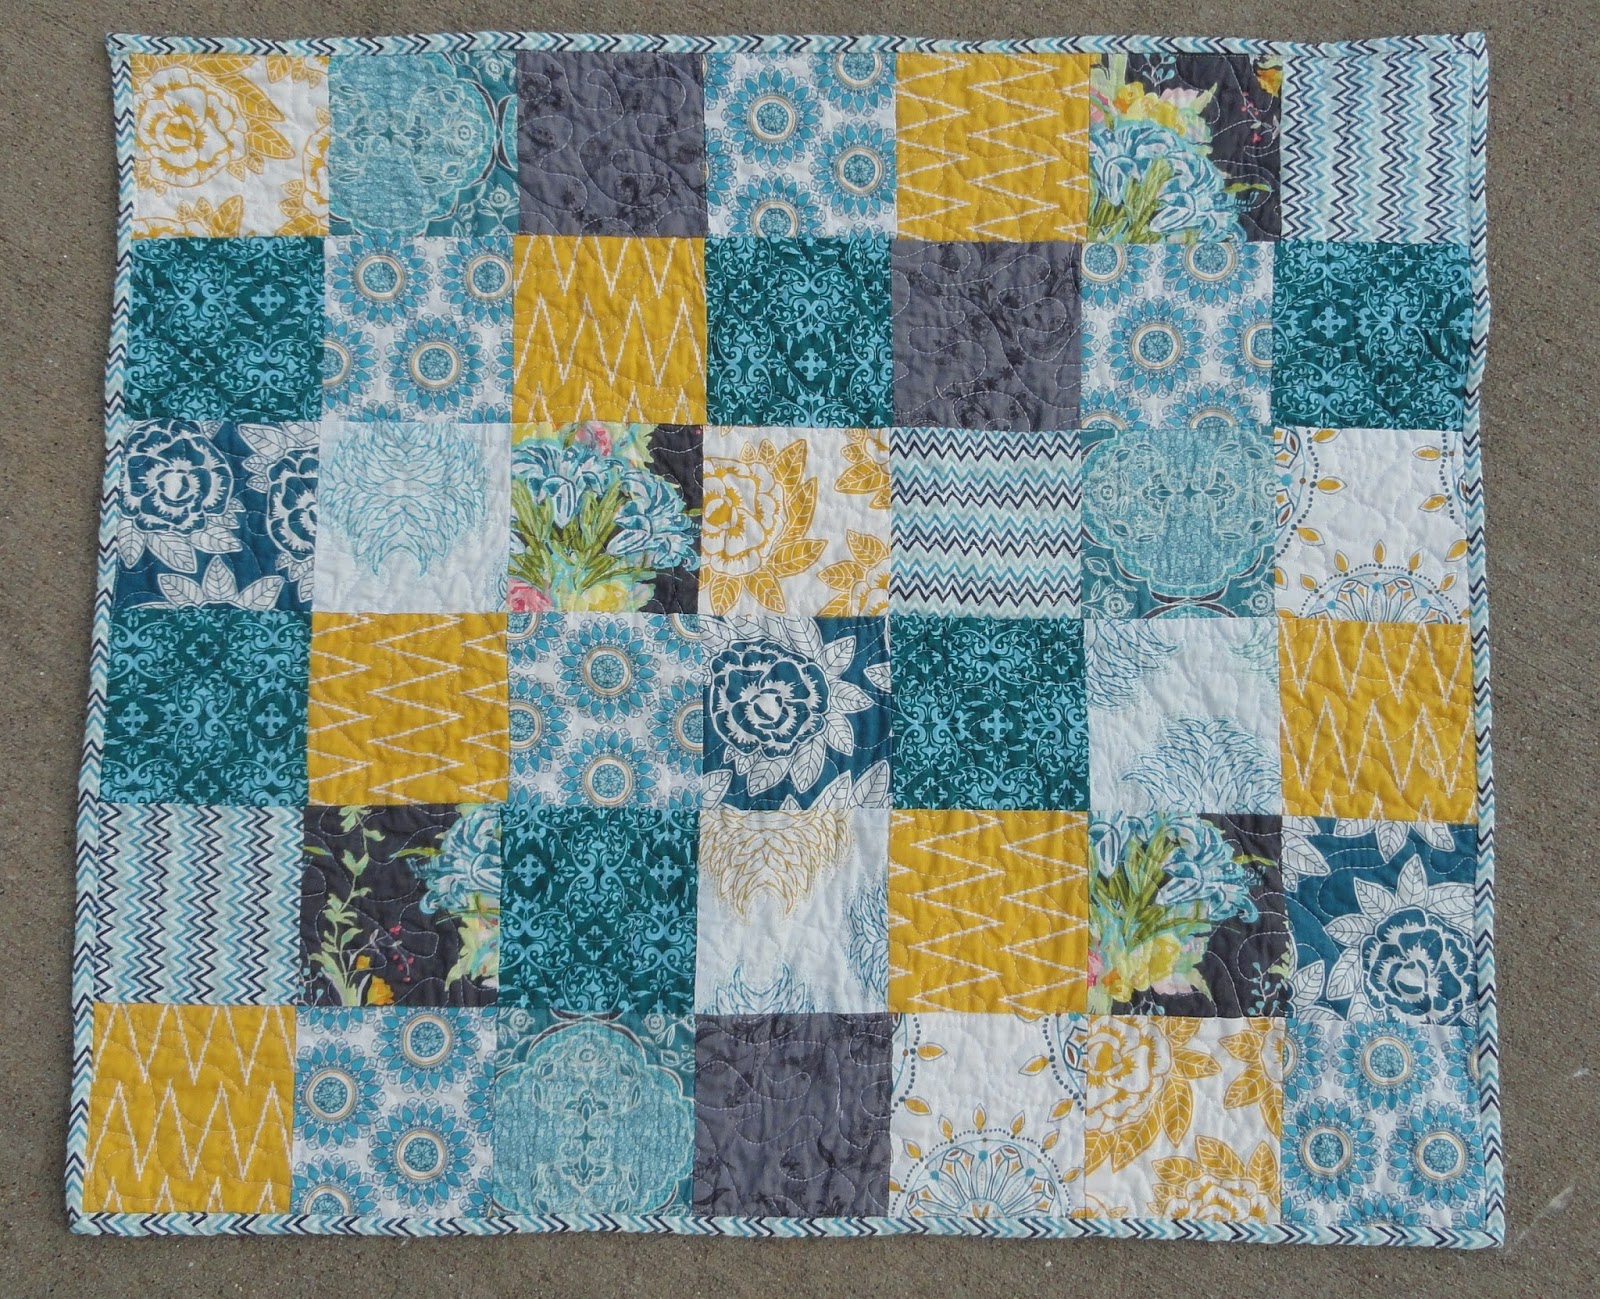
A special little girl I know is
going to be a big sister soon. This is the baby/toddler size quilt I made her. She
lives next door to her grandma who has horses, pigs and goats (not sure if she
has cows). I purchased Moda's, Oink A Doodle Moo panel in red and then used my
own fabric scraps for the rest of the quilt top.

 After I received the panel in the
mail, I decided I did not like the red chicken wire print around the panels. It
looked too boyish, so I cut off the red and added thin pink borders and wider
white borders.....
After I received the panel in the
mail, I decided I did not like the red chicken wire print around the panels. It
looked too boyish, so I cut off the red and added thin pink borders and wider
white borders.....
I cut my scrap pieces at 5" in
length and varying widths. The white strips are 3 inches wide. The finished
quilt is 45" squared.
I used straight line quilting for
this project. For the 45" width, that came to 150 straight lines. I used the
edge of the walking foot as my guide.
For the backing I used Riley
Blake's, Hello Sunshine Birds in red. I thought it was the perfect choice for
the backing to go along with the animals on the front and match all the colors
of the scraps. It also looks like a paisley print from a distance.
I love the straight line
quilting...........look at all those rows!
For the binding, I used Riley
Blake's, Hello Sunshine stripe in multi color.
Another baby gift order completed. Changing pad, two burp cloths and one minky burp cloth. The requirement for this order was to find corals, teals and yellows. I love the fabric lines Indie Chic and Lilly Belle. I had to find corals from other lines to tie in with the teals and yellow.
I found the coral minky at the online fabric shop Hawthorne Threads.
Scroll down to see who I have linked to this week.
I can now check off faux chenille blanket from my to-do list !!! Aunt Betty sent me directions to this blanket over 3 years ago. It really was not a difficult project. More time consuming than anything and hard on the hands with all the cutting.
I chose Riley Blake's Sasparilla in teal for the print and three coordinating flannels in red, teal and blue for the "chenille". I purchased 1.25 yards of each.
My first step was to wash all the fabrics. Since flannel shrinks quite a bit, I did not want any excessive bunching of the fabrics when I washed the final product. I then laid the Sasparilla print face down on the carpet, stretched and smoothed it in place, then laid down the three flannels and did the same with them. Once I had the four layers stacked and smoothed, I carefully flipped them over and smoothed out any new wrinkles.
The first step to start the sewing process is to draw a diagonal line through the middle of the fabric. I used a measuring tape, a yard stick, two bottles of laundry soap and a fabric marking pencil. The soap bottles were to hold the measuring tape in place. I used the yard stick to get a straight line.....
After I had my line drawn, it was time to start sewing the 168 diagonal lines it would take to make the chenille blanket. I first sewed over the blue chalk line and then used the edge of my walking foot as my guide to finish the other lines.
I thought this was a lot of work, until I got to the cutting part. This was actually the easy step.
I bought a pair of chenille cutting scissors from Joann's. You have to cut through the three layers of flannel but not cut into the fourth layer (my sasparilla print). I was nervous with every line and had to flip the blanket over and make sure I was not getting into the fourth layer. The cutting process was very tedious and hard on the hands. The chenille scissors are very, very sharp. I'll spare you the picture of where I stabbed myself in the thigh with them. On accident of course! I was working on the floor, and the scissors were under my leg. Somehow when I reached to grab them, I pushed them into my leg and made a good sized gash that will take a while to heal.
After getting all the lines cut and squaring up the blanket, I rounded the corners using a dinner plate as a guide.........
I chose a teal colored satin binding. I stitched it to the flannel side first and then to the cotton print side.
Two of my rounded corners turned out really well. And the other two not so good. The two where the lines ran this way were the prettiest.
This corner.............not so good !
I ran it through a wash/dry cycle twice and here is how the flannels did their "chenille" magic.......
I think it turned out pretty good for my first attempt.....
Lessons learned for next time:
I will use four layers of flannel instead of three. But i will only cut through three of them. You can see the white of the back of the printed fabric through the cut lines, so I want to try to avoid that next time.
I will also make my lines a little further apart. This will make it easier for the cutting process and I'm hoping give a thicker and taller "chenille" look to the blanket.
I won't double the satin binding. I think it's too thin for this blanket and will look better if it's wider.
I used this blogger's tutorial as a visual reference. She gives an easy to follow step by step.
Scroll down to see who I have linked to this week.
Another baby girl order completed. I love these fabric choices. Girly without having to use a lot of pink!
Scroll down to see who I have linked to this week.